Get the Bevel Out of Wood Floors
Removing the bevel from wood floors can be a challenging task, as it involves altering the edges of the floorboards. Here are a few methods you can consider:
1. Sanding
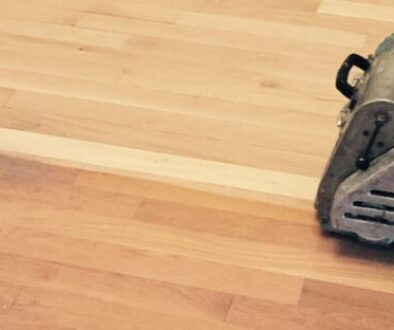
This method involves sanding down the beveled edges to make them flush with the rest of the floor. It can be time-consuming and requires careful attention to avoid uneven surfaces.
Steps:
- Clean the Floor: Thoroughly clean the floor to remove any dirt and debris.
- Sand the Bevel: Use a belt sander with coarse-grit sandpaper to sand the beveled edges. Be cautious to avoid creating dips in the wood.
- Fine Sanding: Switch to a finer grit to smooth out the surface.
- Clean Again: Vacuum and wipe down the floor to remove all dust.
- Refinish: Apply a wood finish to match the rest of the floor.
2. Filling the Bevels
This method involves filling the bevels with wood filler to create a smooth surface.
Steps:
- Clean the Floor: Ensure the floor is free of dust and debris.
- Apply Wood Filler: Use a wood filler that matches the color of your floor. Apply it to the bevels using a putty knife.
- Smooth the Filler: Smooth out the filler and allow it to dry completely.
- Sand: Sand the filled areas to ensure they are flush with the rest of the floor.
- Clean and Refinish: Clean the floor and apply a finish to match the surrounding wood.
3. Replace the Flooring
In some cases, it may be more practical to replace the beveled boards with new, non-beveled ones.
Steps:
- Remove Beveled Boards: Carefully remove the existing beveled floorboards.
- Install New Boards: Install new, non-beveled floorboards.
- Sand and Refinish: Sand and refinish the new boards to match the existing floor.
Tips:
- Test First: Before starting, test your method on a small, inconspicuous area to ensure it gives the desired result.
- Professional Help: Consider hiring a professional if you’re unsure about doing it yourself. They have the tools and experience to do the job correctly.


